Telepy
Telepy is a recreation of a teletype terminal interface using TCP this project has been going on for almost 3 years. It features encrypted inputs, colour text, colour 2d arrays and more. The project features a complied exe client, a version for Linux, and server tools. If you want a server, try going to 'server.fractaldev.co' where Telepy-connect is running. This is also a project running alongside this not the only use for this project you can use it for server monitoring, making an online version of the cli python project and more.

Contents
- Telepy
- Contents
- Client
- setup
- Connecting to a server
- Settings
- Server
- Setup
- Server Structure
- Syntax
- Server Config
- Contributing
- License
- Planned updates
- v1.5.1
- v1.5.2
Client
setup
To set up the client to download the latest release this should be in the format of v(version).zip. This file contains two folders a server folder and a client folder this folder will contain a and exe, py and txt files. If you are on Windows you can just run the exe (Windows Defender will pop up click more info then run anyway. If you do not feel that you can trust the exe run the Client.py in the source code this is not the most optimised version though and may not be the correct version.) if you are on a Linux distro run Telepi.py.
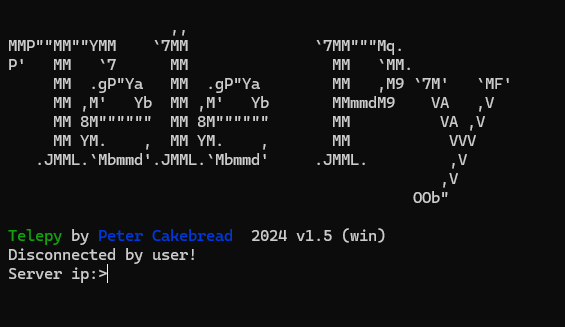
Connecting to a server
To connect the server just enter the ip or the domain by default servers rn on port 1998. For the custom ports add : at the end of the IP/domain then the port eg exsample.com:1234. For the local host just enter @ and : for the port eg @:1234.
Settings
Settings can be easily changed at the prompt just enter settings.
Server
Setup
To start a server go to the server folder of the release zip. There is a directory called TelePy and there should be a file called tp.py this is where the library is. To run the server simply run the main.py in the server directory.
Server Structure
The structure of the main.py is recommended but also advised to modify/expand upon it depending on the project. Import the library with from Telepy import tp as tp. To make a connection start by setting up the socket with Sct = tp.setup() this will be configured based on the server_config.txt read the config section for more info. Accept the connection with client_c, add = Sct.accept() this will store the connection as client_c and the connection IP address as add. Now you need to create the client object using client = tp.Client(client_c, add). After that abide by the syntax.
Syntax
Here is the documentation of the syntax for telepy all examples have client as the client object and use from Telepy import tp as tp
Log
This is a function built into telepy to make logging easier just use tp.log('exsample.txt', 'Hello world!') the log file or directory should be in the same directory as your server script.
Setup
This function creates the socket that the server will run on based on the server_config.txt e.g. tp.setup() or tp.setup_log('exsample.txt') to log the output it gives.
This is the simplest function and just prints plain text client.print('Hello world')
Cls
This function will clear the client terminal. client.cls()
Input
This function will give a client a prompt and then return the string they enter. user_input = client.input('Prompt :>')
Hidden_input
This function will give a client a prompt then it will hide the input when the user enters it in the client, then return the string they enter. hidden_input = client.hidden_input('Prompt :>')
Password
This function will give a client a prompt then it will hide the input when the user enters it in the client, then return a hashed string of what they entered. password = client.password('Enter Password input:>')
Client_version
This function is great for ensuring compatibility with the client the function will return a string which is the client version. client_version = client.client_version()
Device
This work simular to Client_version but will return a string of the version of the client eg win, web, lin, crt. device = client.device().win is a windows based client, web is a website based client, lin is a linux based client and crt is a linux based client but has a smaller screen size and wraps text differently.
Weather
This function will display weather information by running curl wttr.in on the client it would also add on the client's location if they have specified it in their config.txt.
Printc
This function will print colour text by specifying a foreground colour and a background colour in an array in that order like this colour_data = ['green', 'black'] then client.printc('Hello world', colour_data). Compatible colours are 'black', 'red', 'green', 'yellow', 'blue', 'magenta', 'cyan', 'light_red', 'light_green', 'light_yellow', 'light_blue', 'light_magenta', 'light_cyan', 'white'.
Print2d
This function will print a 2d array on the client end. client.print2d(screen) The array should be in the format of an array with each line a sub array.
Print2dc
This function works in the same format but requires colour information. client.print2dc(screen) The array should contain a sub-array of each line and each character should display another subarray with colour information eg [['@', 'red', 'black'], ['@', 'green', 'black'], ['@', 'blue', 'black']] that would be one line of the array the colour is limited to the same set as printc.
Closet
This is a function to close the client and give a message to display when disconnected. client.closet("Disconnected from server.") As a good rule make sure the disconnect message is helpful and informative.
Closet_log
This is a function functions the same as Closet but logs the disconnect to a file. client.closet('example.txt', "Disconnected from server.")
Server Config
This specifies the configuration for the server in the file called server_config.txt. To set the port use port=1998 the default port is 1998. For the amount of clients the server listens to use listen=120 the default is 120.
Contributing
While this is a personal project, contributions are welcome! Please follow these steps to contribute:
- Fork the repository.
- Create a feature branch (
git checkout -b feature-branch). - Commit your changes (
git commit -m 'Add some feature'). - Push to the branch (
git push origin feature-branch). - Open a pull request.
There will be a list of features at the bottom of the page for future updates that I am planning to work on feel free to give them a shot any help is appreciated.
License
This project is licensed under the MIT License. See the LICENSE file for more details.
Planned updates
v1.5.1
Automatic Updates
The client will automatically update and also be able to revert to older versions. not older than 1.3.1 due to older version security risks.
Bug fix
Users can set on input for an indefinite amount of time. The causes server resources to be used while the client is not engaged. This will be fixed with a time-out period set in server_config.txt.
v1.5.2
Cookie-like feature
This may be implemented in different ways such as basic cookies but also a session-like feature featured in flask.
Potential updates
- Assic art generator (text like the Tele py logo)
- Compiled linux disttro (client)
- Better cli for client eg
telepy server.fractaldev.coinstead of running the client then entering it. - Api service to check server status.
Images